Although we had originally planned to ask Georgie's brother to help out with making music for our opening, we later decided that it would be a better idea for us to produce our own music through copyright free music online. This was due to the tight tim schedule we were on and we thought this would be the most time efficient method. There is also a wide range of music to be found online, therefore we could try many different techniques and ideas in a shorter amount of time to find what we want.
We had previously spoken about using a lullaby for our opening and getting one of our actors, Lauren Barlow, to sing it. This was due to her having lots of experience singing and we thought it would add depth to our opening as she would be singing a repetitive tune, a sign of obsessiveness. However, after some consideration, we ruled this idea out as due to our lack of resources and budget we wouldn't be able to access a recording booth.
Thursday, 31 March 2016
Production: Making Credits and the Title
Initially to find some inspiration for the credits for our film opening we looked at a few different clips from films in the same thriller/ psychological orientated genre. One example of this was The Perks Of Being A Wallflower. This film uses the font style to suggest that the narrative is an account of Charlie's (the main protagonist) life, similar to a diary entry.

Title:
We chose the typewriter font as we wanted to create a sense of enigma. The font could represent a diary entry or it could represent a police report for a murder/ disappearance of the friend.
To make our credits we wanted to keep it as simple as possible as we didn't want to overdo it and have it come across as unprofessional due to our small budget. To create the title, I used the computer programme PowerPoint to create the basis for the titles. I created a different slide for every letter (in the font courier which greatly resembles a typewriter) added to the title. As the animation we were aiming for was the effect of a typewriter typing it across the screen. I then took screenshots of each slide and inserted these as images into iMovie. I then downloaded a sound clip of a typewriter from YouTube and inserted a section of this clip into the iMovie file. I timed it so that when the letters appeared (approximately 0.2 seconds apart) the sound would be in sync. I also downloaded another sound clip from YouTube of the 'ding' of a typewriter when it movies across the paper. I then added this onto the end of the file. I then exported this and added it to our final film.

Credits:
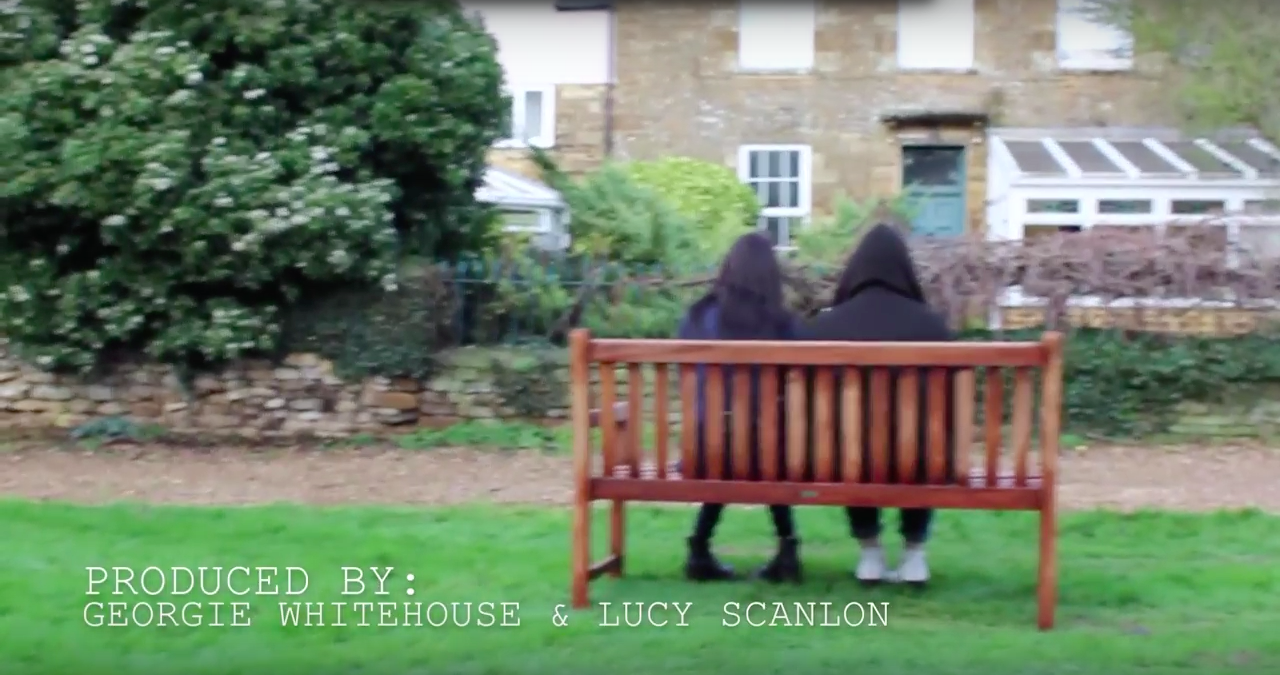
To create the credits we used the credit option on iMovie as we thought this would be the easiest and most efficient use of our time. We used the font 'Courier New' to create our credits. We chose this due to feedback we got from a focus group of members of our target audience. We also thought the would be a good idea as well due to the theme of literature and writing appearing throughout our narrative. An example of this being the typewriter style ending title, as well as props such as books in the opening with plots hinting at the issues our character is facing e.g. darkness, depression. We used a simple fade transition for the credits as we didn't can't it to seem unprofessional or childlike. We chose to place our credits in the bottom left hand corner of the shots showing the bench scene, this was so they weren't a distraction to flashbacks which were essential to the plot.

Wednesday, 30 March 2016
Production: Deciding Credits Focus Group
For our credits we created three different styles we could possibly use with different fonts. We wanted these to reflect the feel of the film whilst it still seeming professional.

Courier New :


We tested out three different fonts to use for our credits:
Didot:

Courier New :

Chalkduster:

Focus Group:
After creating these example credits we then decided to audience test the fonts with a group of people who represented our target audience, young adults between 15-25. We asked Chloe Scanlon 18, Molly Braggins 16, Jessica Underwood 16, Emily Marsh 16 and Anna McAllister-Little 17.
After showing our focus group a rough cut of our opening, we asked them to select the font they thought was the best fit in our narrative and genre. The results are shown below:
Didot: 0
Courier New: 4
Chalkduster: 1
After they gave their vote we asked them for their reasoning why they chose a certain font. Some popular opinions from our group was that the typewriter font linked well with our narrative and worked well with the end titles. It was also suggested that it gave a dated feel to the opening and added a sense of mystery and enigma. It was widely thought that the font 'Didot' was too simplistic for the narrative and also harder to read than preferred. Although it was mostly agreed that Chalkduster could have worked, many felt it looked unprofessional and childish compared to the Courier New font.
Based on the response from our focus group we have decided that we will use the font Courier New throughout the credits for our film.
Tuesday, 29 March 2016
Filming: Day Three
On this day we chose to film the flashbacks for the murder scene. For this we didn't bring our actors in as we didn't think they would be necessary as our shot only needed a hand and not the actually actors face or clothes. We thought it would take such a short amount of time to film that it would waste time getting our actors to come to set as they had other commitments. We chose to film this at night as this is is a typical convention for when crime takes place. We used Georgie's hand for the hand in shot while I controlled the camera. We chose to use a bright light from behind the camera to light it as it it creates an image that she has just left the scene where the murder has taken place e.g a house. We also tried to make the background as dark as possible as this contrasts how bright the happy flashbacks were. We used fake blood and a wooden kitchen knife for the scene. We chose a wooden kitchen knife as we needed a realistic weapon that a teenager could get hold off in a rural village were weapons such as guns wouldn't be available.


We used close ups of her hand as when holding the hand she slightly trembles, this emphasises the intensity of the situation. We also used a point of view shot of her our main character looking down at her blood stained shaking hand, this also shows the audience the horror she is feeling due to her actions.
Monday, 28 March 2016

Sunday, 27 March 2016
Post-Production: Editing A New Draft
After our feedback session with members of our target audience, we started adjusting our rough cut to the changes recommended in the feedback. Firstly we cut down some of the shots, two examples being the shot of the two girls walking down the street and the shot of the main characters friend getting up to check the schedule at the bus stop. This was because the camera was out of focus for the majority of the shot.
We also thought we needed a bigger build up to create a greater impact at the end of the opening when the main character looks directly into the camera. Therefore we took bits and pieces from our clips and put together fast paced montage of all her memories. This could represent her life flashing before her eyes and the adrenaline she feels before coming to the realisation that she has hurt her friend.
We also got rid of some of the scenes we had previously and instead used the footage for small jump scares for the audience.
We also started adding music to our production through the use of different sound clips we had downloaded from copyright free videos on YouTube and other websites.
After we added music we started adding credits to our opening.
Sunday, 20 March 2016
Post-Production: Changes to the Ending
After we showed are focus members our first edit of our production, we received feedback about the ending our production needing a bigger impact on the audience. Some members of our target audience also stated they were too confused about what happened to our main characters best friend. They weren't sure if she was killed, if they had an argument or she wasn't real in the first place. To solve this we decided we needed to change the ending to our production.
To create a bigger impact we decided to edit a montage of small clips from the memories and flashbacks we filmed. This would act as her life flashing before her eyes due to the trauma she is experiencing. We decided we would also time these flashbacks to the rhythm of a heartbeat. This would show the audience the complete decline of her mental health from the happier memories to the penultimate moment when she is sat alone on the bench without her friend.
Some other feedback we got from our focus group was that the fate of her friend wasn't clear in the production. It was too confusing whether she was real or had never existed or if she had been hurt. Although we originally wanted to leave this up to interpretation, we decided we needed to add a few shots into the opening to give a brief explanation for what happened to her. To do this, we set up one extra evening for filming a quick scene with a hand holding a knife dripping with blood. We chose not to include our actors for this as it would take us a very short amount of time and we could use our own hands for the shot as the persons face and clothing won't be shown in the shot. These shots would show for a very brief amount of time but would hint to the audience about what happened to her friend and would give reasoning for why she is sat alone at the end. We also included a Point-Of-View shot of her looking at her blood stained hand, this represents her realisation of her actions. As most of the clips used for the montage were of our main character, it would be clear that the hand and the POV shot were her.


Friday, 18 March 2016
Production: Ident
After researching different film openings, we decided the best option for us to make our opening as professional as possible is to create our own ident from scratch. To do this we used PowerPoint and iMovie.
To do this we used the image, text and colour options in PowerPoint to create an image/logo we liked. In the end we came up with this:

We used a black background to symbolise danger, death and loss of identity. We used red imagery and text to symbolise danger, blood and death. These two colours make the audience immediately aware of the genre of the film. We kept the imagery simple.
We then added this image into iMovie. We selected an option that animates the image slightly. Initially it starts off just an image of the house and eventually zooms out the reveal the whole logo. We thought this slight animation made it look much more professional. To add the sound effect we downloaded a sound clip from a copyright free website and took a section to fit the Ident. The slow hum of the sound, dramatises the ident preparing the audience for the start of the film.
Tuesday, 15 March 2016
Ident Research
From my initial research, I learnt that filmmakers used replaced well known ordinary idents with much darker colours. This is done to reflect the genre of the film, letting the audience know what to expect from the film before it even starts playing. Some popular colours used in these idents are black, blue and red as these colours have connotations of danger, death, sadness and loss. I will consider this research when designing my own ident, especially the use of colour. Here are some examples of idents used in successful thriller films:


Monday, 14 March 2016
Pre-Production - Rough Cut 1 Audience Test:
We created a focus group from people who represented our target audience (15-25). We showed them the rough edit of our first draft and asked them questions about what they thought we did well and what we needed to improve upon. The focus group consisted of 4 females, although we would have liked a mixed gender group, these were the only people available to us at the time. The people in our focus group were:
- Emily Marsh 16
- Molly Braggins 16
- Jessica Underwood 17
- Anna McAllister-Little 17
Here were the results:
Are there any parts of the footage you think we could improve on?
- Some of the shots of the bench scene are very bumpy. Make them smoother to improve the look of the shot.
- Scene at the bus stop, a lot of it is out of focus, your opening may be better if you cut the shot or cut down the timing of it.
- The shot of them walking down the street is too long.
What sort of the music do you think we should add?
- Something innocent but eery
- Something that subtly builds suspense, but you don't want it to be too dramatic.
- slow music that slowly builds up to create tension.
Does the opening set a good tone for the rest of the film? Can you get a feel for the narrative of the film just from the opening?
- Yes, it sets an eery tone and leaves you wondering what the full story is.
- I thought it was a good first draft, I think the music would really bring the opening together for the rest of the narrative.
- I liked the constant contrast between past and present in this opening. It makes me very intrigued for the rest of the film.
Do you have any extra feedback?
- I think it needs to be made more clear what happens at the end to the girls friend because its quite confusing. We aren't sure if she was real or not.
- I think there needs to be a bigger impact with the ending.
This feedback from our focus group helped us get a good range of ideas on how to improve our opening to create the final edit. We also got some good feedback for which music would work well with our production.
Production: Rough Draft 1
Film
This is the first edit of our final media film. We edited all the clips together to create an outline of what our final film will look like. In this edit we haven't added music yet or any credits. By making this first edit without key components such as music allows us to take feedback from our audience on the storyline alone and make it the best it could be, as music creates a large impact and could mask some improvements we could make.
The Reaction:
We asked two members of our class to watch our first edit and tell us their thoughts, this was Molly Braggins and Jessica Underwood. We thought they would be helpful people to ask as they are in our target audience in terms of age as they are both between 16-17 years old. They are also media students themselves so we thought they would offer helpful advice from an education perspective. After we showed them the clip we asked them some questions for us to get some constructive advice.
What We Did Well:
From our feedback we gathered that we told the story well through the use of filters and makeup and editing to show the deterioration of her mental health. Another piece of positive feedback we received was that ambient sound added was good and fit into the scene well. The example they used was the bird song added during the beginning of the opening, our feedback stated that it added a calming tone to the scenes
Sunday, 13 March 2016
Editing: Dividing the Work
As myself and Georgie each owned the software we needed to edit our film on our own laptops we decided that it would most efficient to divide up the flashback scenes equality between the two of us to edit. Each flashback scene will be edited in a separate iMovie project and then once edited they will be exported and put into one final project that will be our final film. By doing this is allows us to spend more time editing as we don't need each other to be there whilst we edit. It also allows us to contribute equally to the editing process and allows us to include our own creative ideas. However to avoid wasting time we will show each other our finished flashback before we export it so we don't have to go back and make changes. This will be a quicker method meaning we can spend more time on editing our film as whole.
Filming Day Two
Our second day of filming took place on Monday January 11th. For this day, we focused on filming the flashbacks for opening, making the most of our time to film as many as possible.
We started the day by using the first hour to prepare both the girl's makeup for the flashbacks. For the first part of the day we were filming happy flashbacks, therefore we did both our actors makeup in the simplistic, natural look we planned beforehand. We then filmed the happy flashbacks, for example, the photo and book reading flashback, as well as some flashbacks outside on the street.
We then went back inside for the second part of the day and adjusted our main actors makeup from the natural makeup to the darker, more sinister, vacant makeup. We then filmed scenes such as the mirror scene and the crying scene. By the end of the day we had filmed all the flashbacks we needed.
Our next step is to put our clips together and create a first rough edit and get feedback from our target audience. During editing, we will also see if there is anything we have missed and will need to do on another day of filming if needed, this could also give us an opportunity to re-shoot anything thats not the quality we expected.
Wednesday, 2 March 2016

Subscribe to:
Comments (Atom)